
January In Jeneral Week 3 Recap: Kitchen & Pantries
January in Jeneral week 3 has officially concluded. This past week’s focus was all about reorganizing and restructuring our kitchen and pantry. If you haven’t already started, it’s never too late. Take a peek at our getting started blog for everything you need to begin. With that, keep reading for a recap and details on organizing your kitchen and pantry!
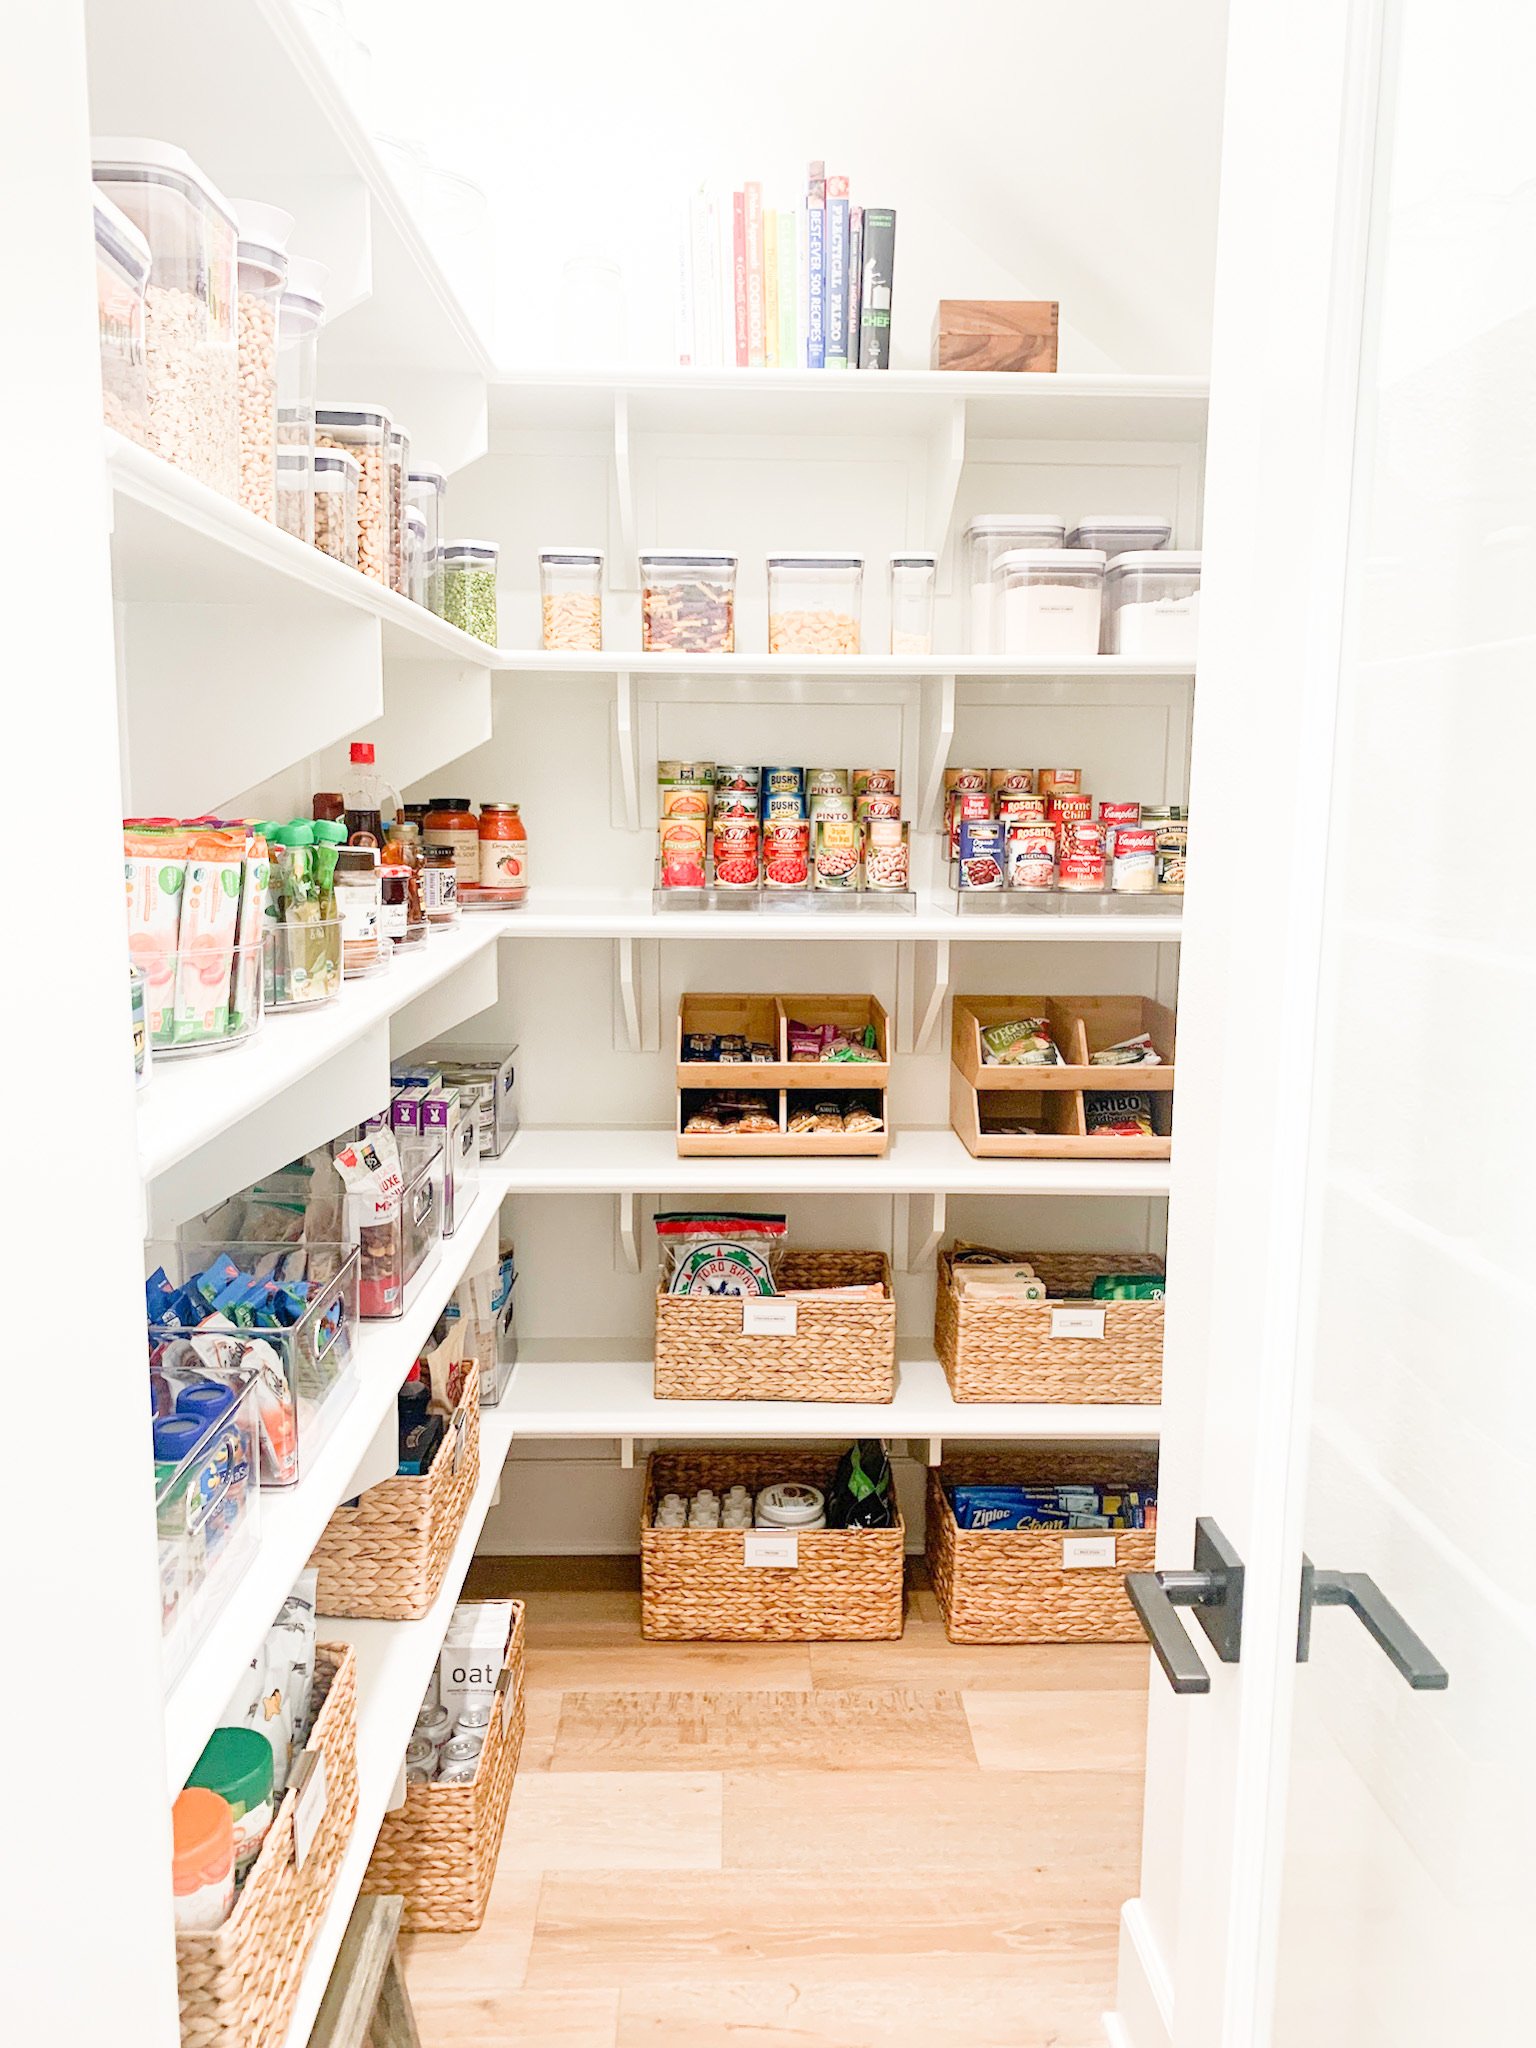
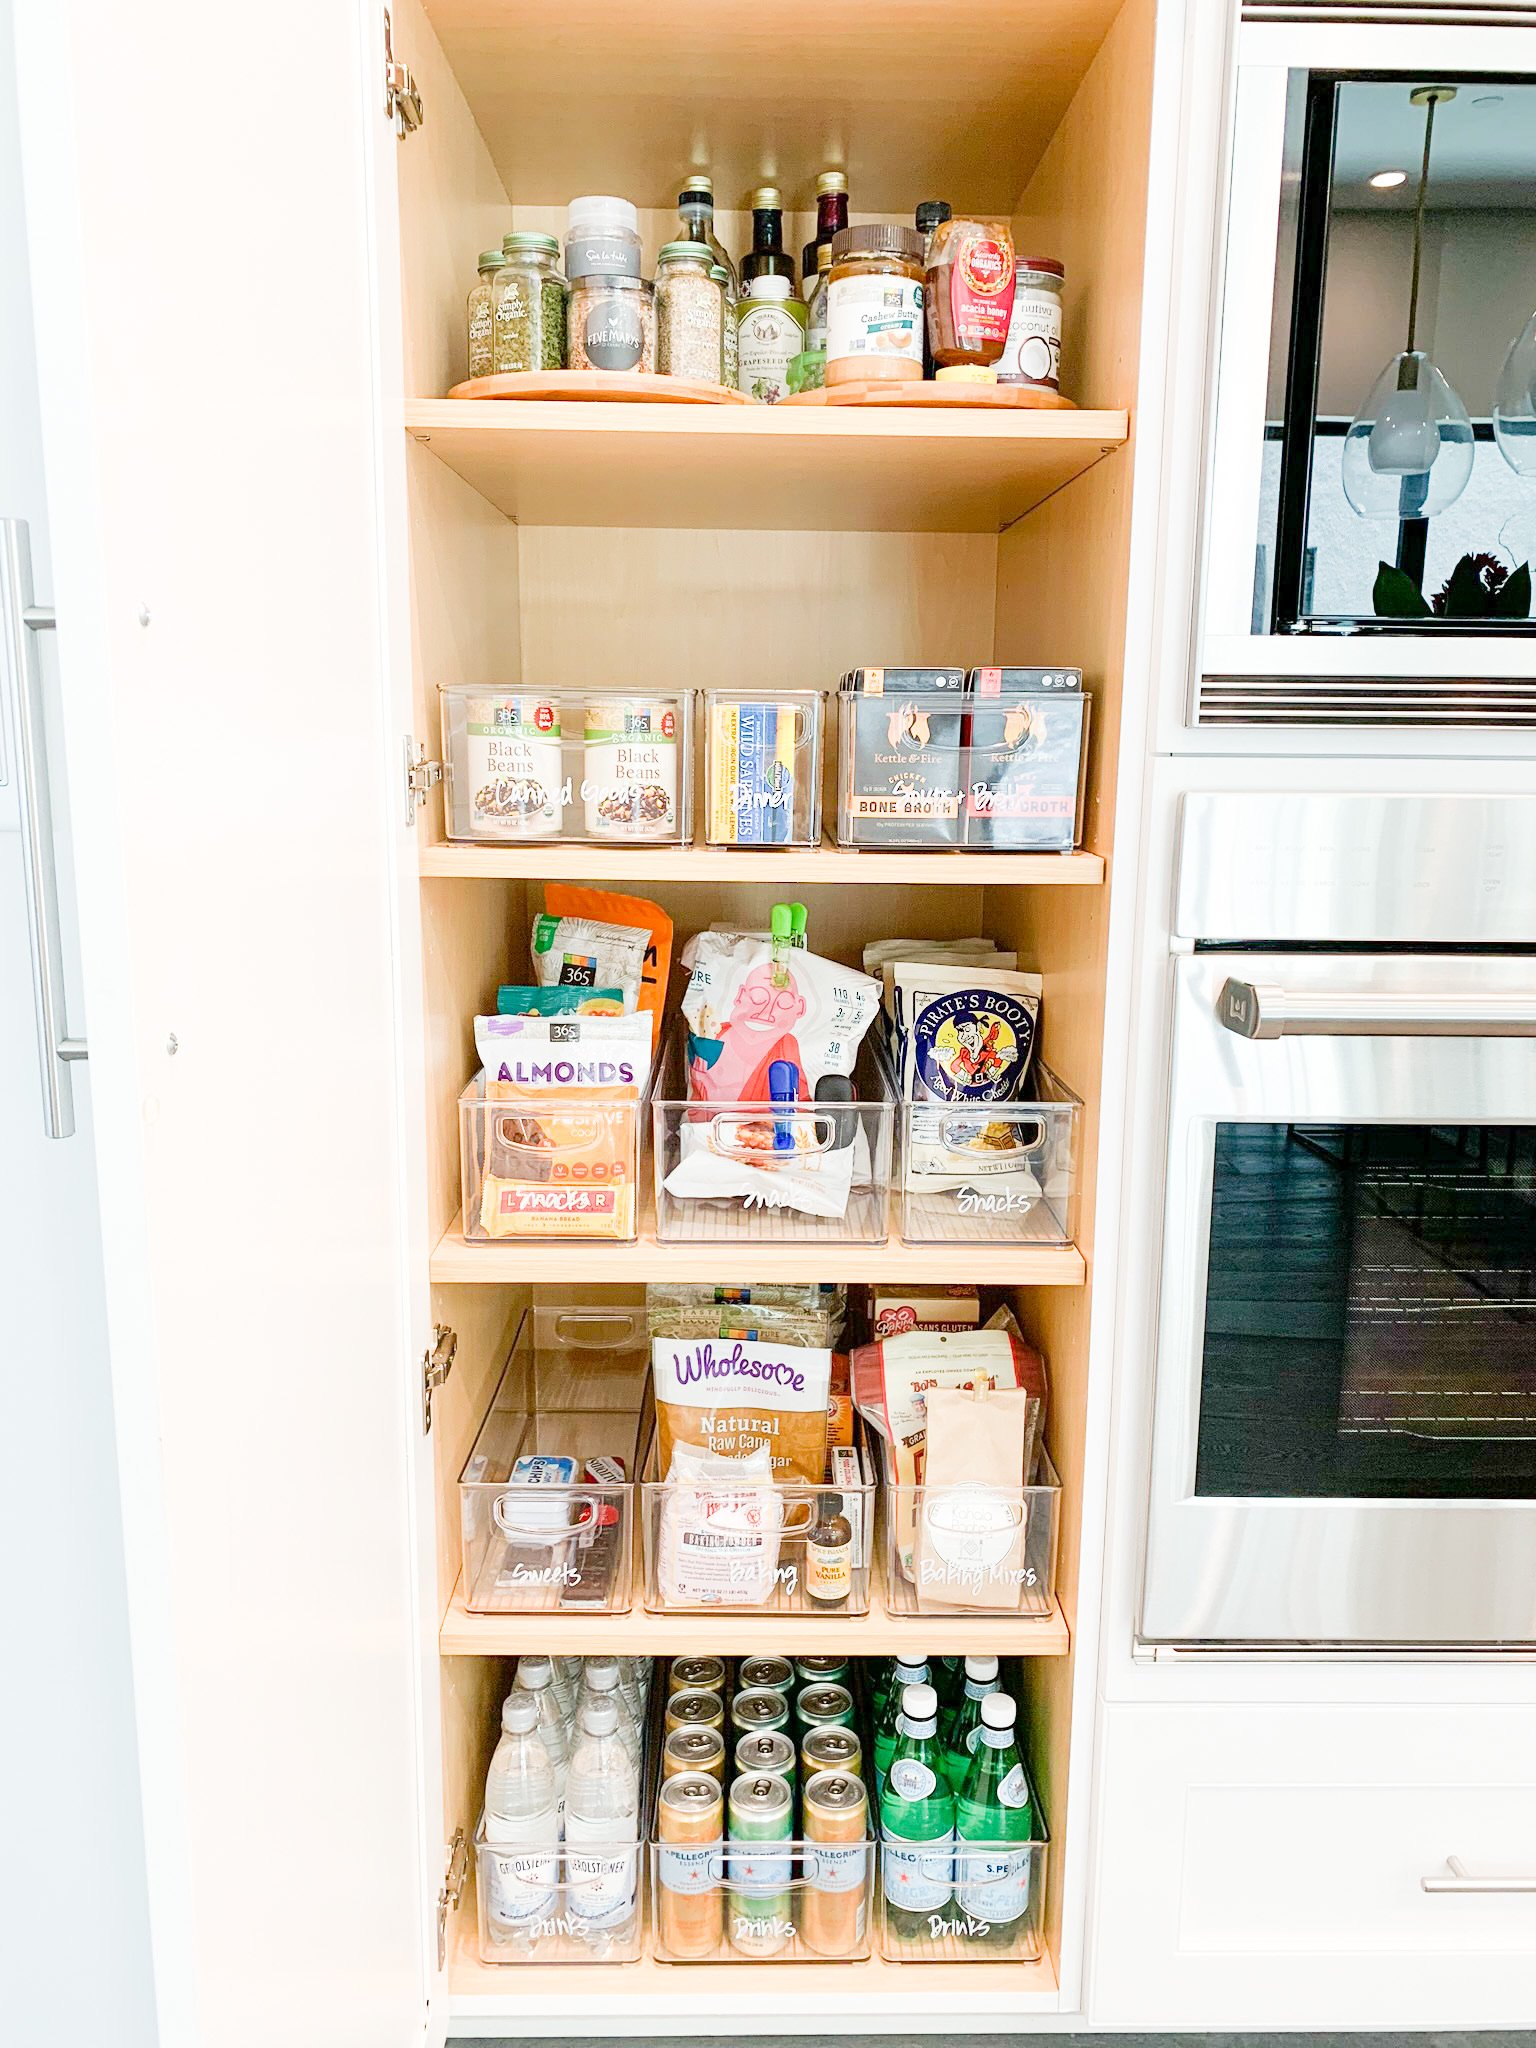
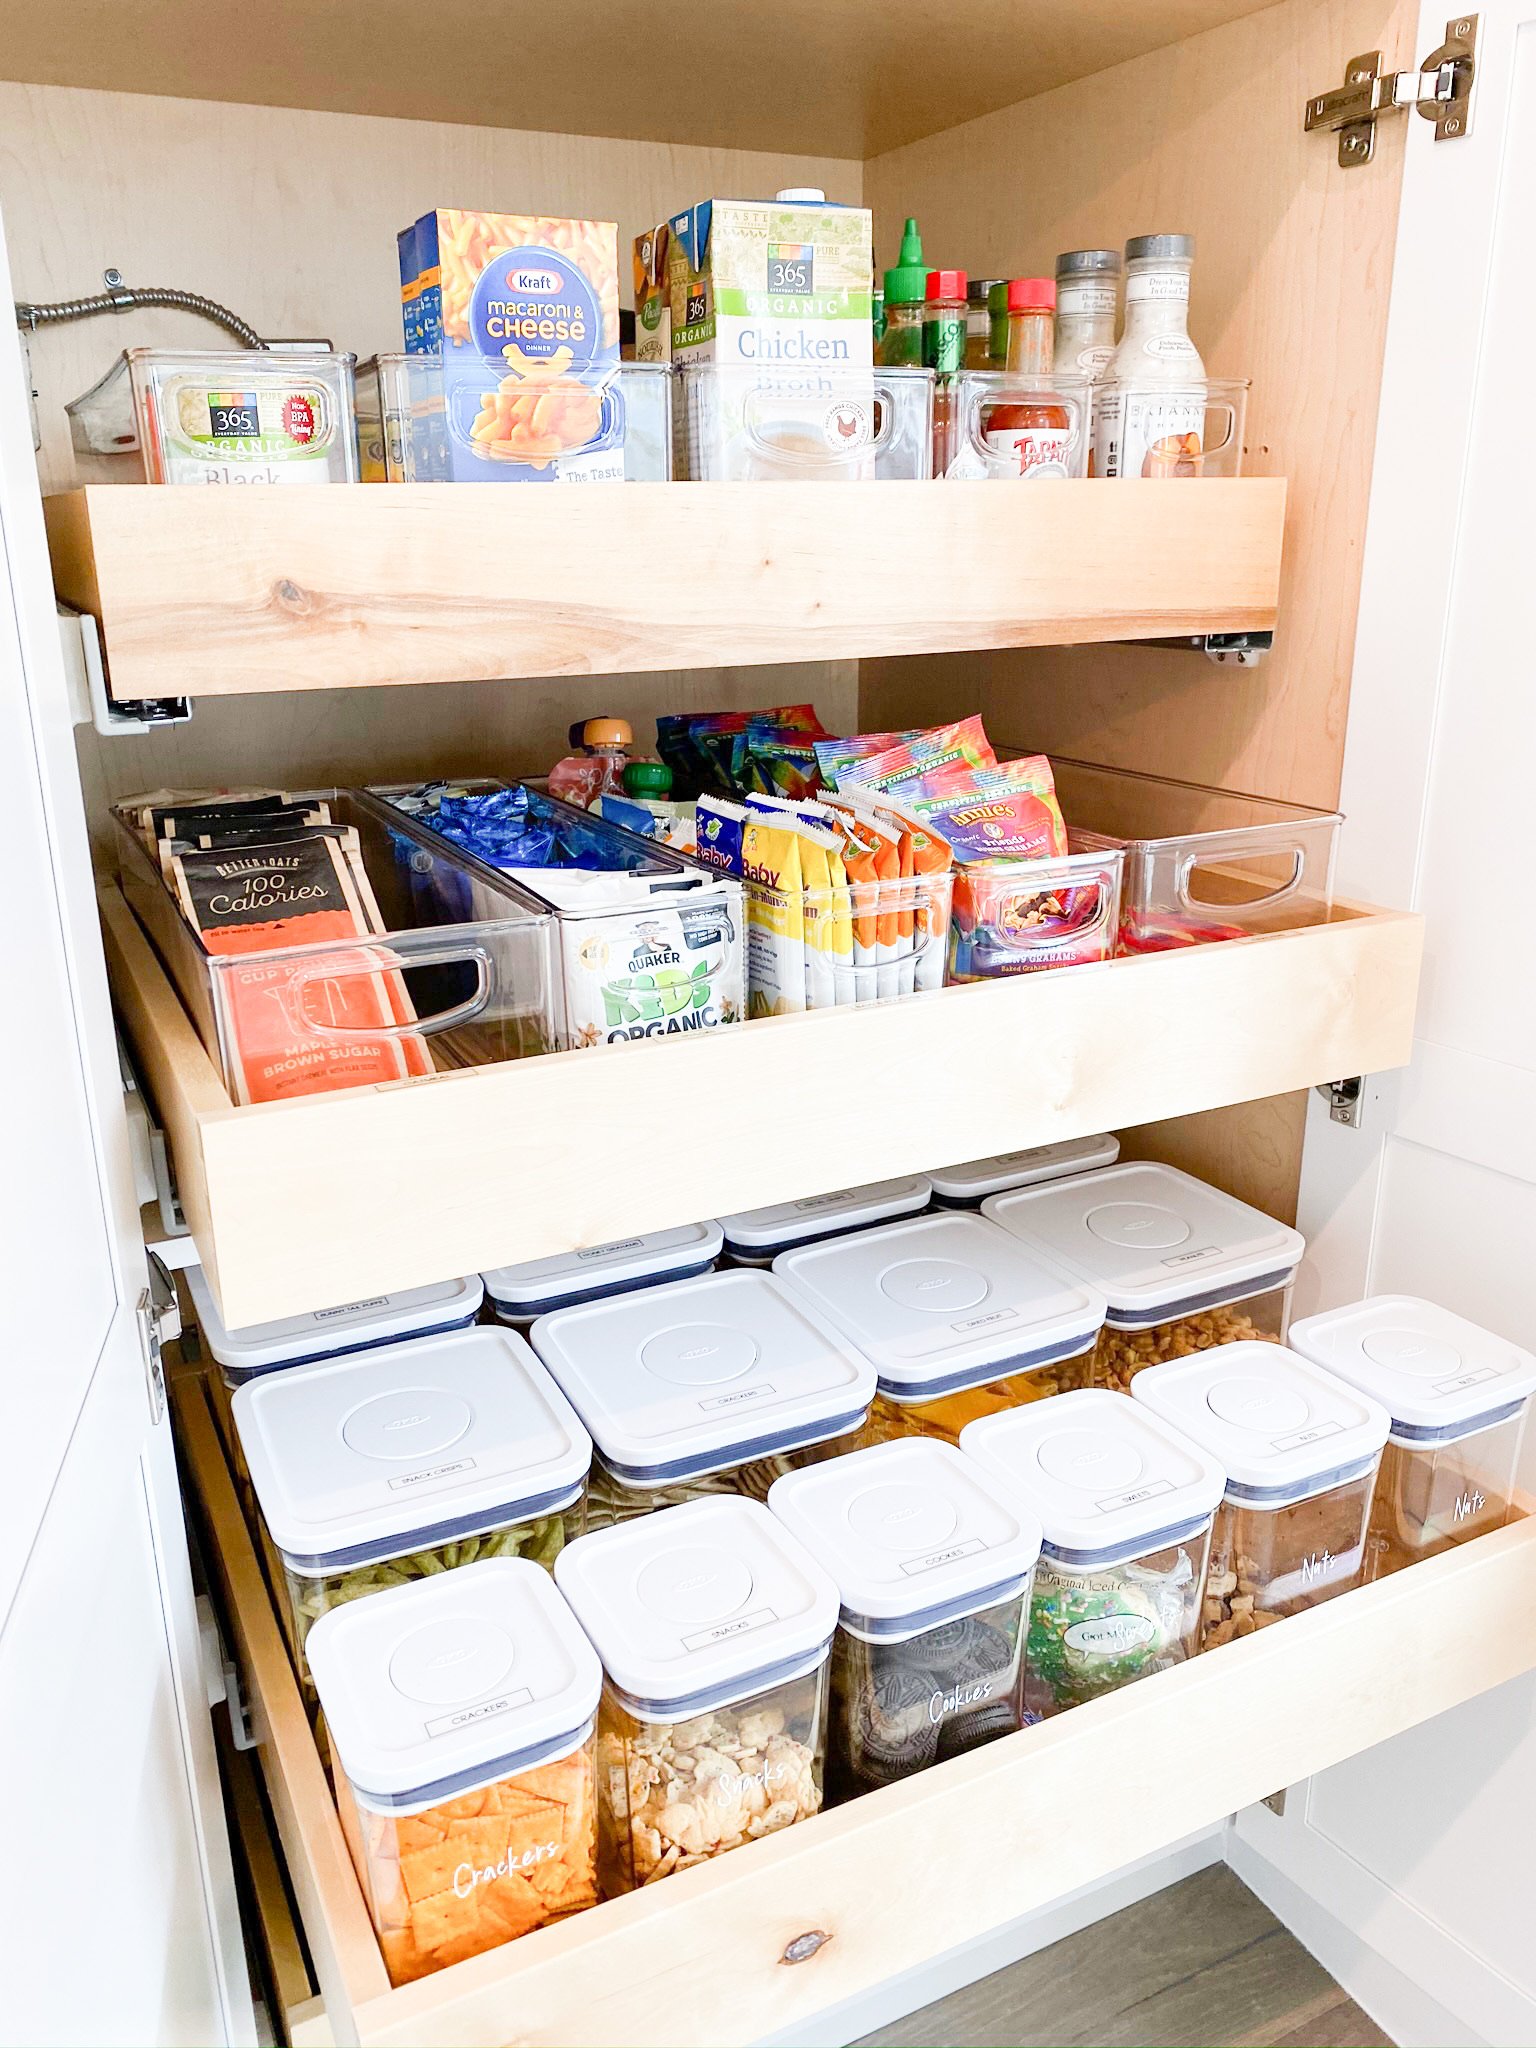
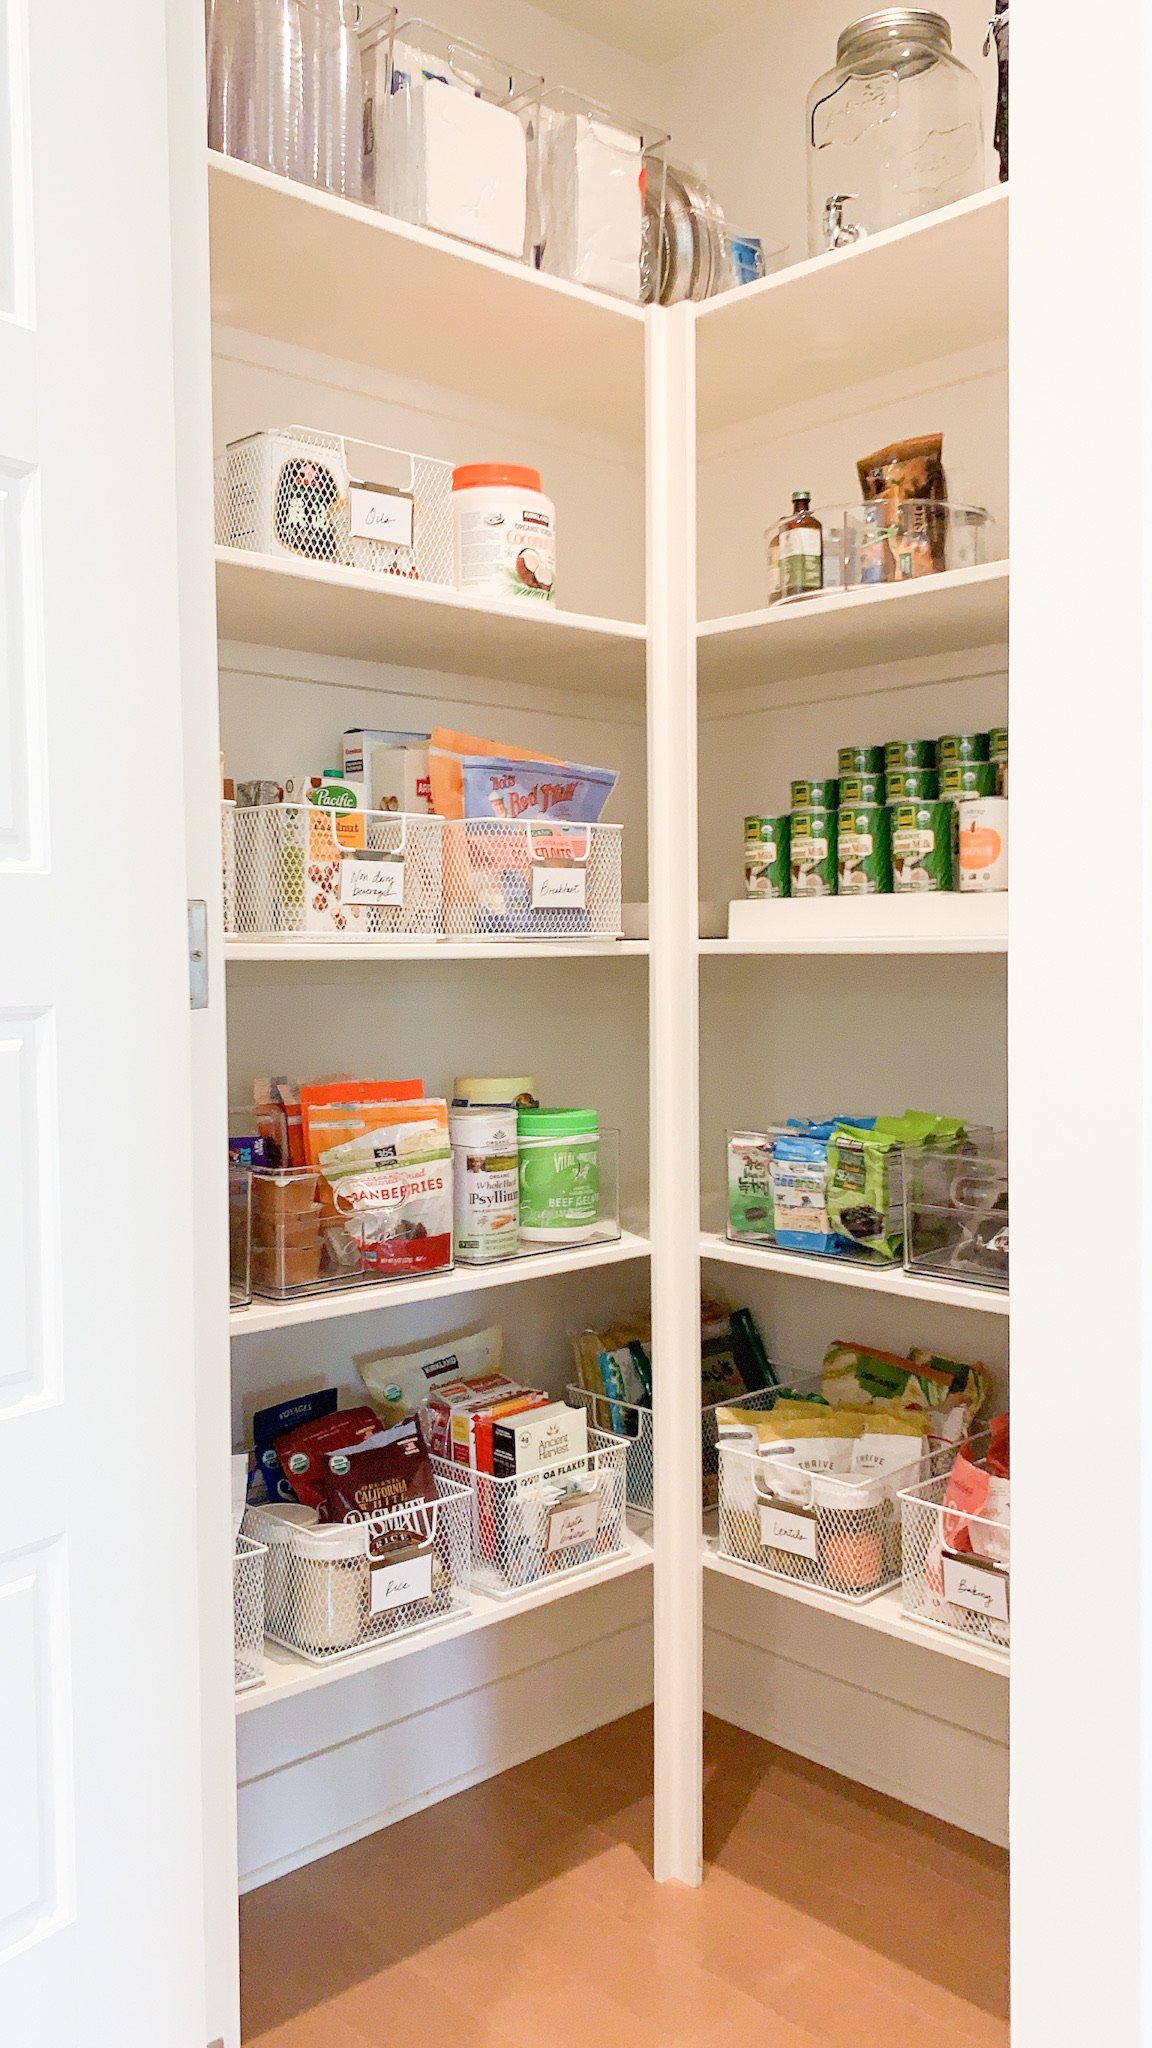
Before you tackle this area of your home, it’s important to identify what type of pantry you have: walk-in pantry, small pantry, cabinet pantry, or deep drawer pantry. Organization is for all spaces, no matter the style or size. Regardless, you need to identify the type of pantry you have before deciphering how to structure it.
From here, I want you to start to view your kitchen in zones. This will help support you in establishing the most efficient way to set up your space. There are 5 kitchen zones I recommend, but feel free to shift this based on your inventory and your unique home: the consumable zone, the cooking zone, the non-consumable zone, the cleaning zone, and the prep zone. You might be asking, what exactly is included in each zone and where should they be placed? This should be specific and individual to you, but I suggest the cooking zone near your stovetop or oven, containing items like baking sheets, pots, pans, dishes, spices, and cooking tools. I like to keep the consumable zone near the fridge or pantry. I usually place any and all tupperware, storage containers, plastic wrap, foil, and plastic bags in this zone. The non-consumable zone will be near the sink and dishwasher. This area will include your plates, bowls, glasses, silverware, cloths and hand towels. The cleaning zone might be self explanatory, but I typically recommend under the sink. As you’d imagine, this will be classic cleaning supplies, sponges, dish towels, trash bags, detergent, etc. Finally, the prep zone. I like this zone as close to ample counter space as possible. This zone should contain your cutting boards, mixing bowls, serving bowls, kitchen gadgets, sharp knives, and mixing gadgets. If you are looking for a little more detail on how to zone your kitchen or pantry, take a peek at my blog, Jen's Pantry Organization Must-Haves. Now that we have covered this identification step, we are ready to move forward with our January In Jeneral daily roundup.
Day 15
For the first day of kitchens and pantries, we put our focus on kitchen drawers and countertops. Whether you are able to clean out one drawer or all the drawers in your kitchen, recognize that you are making progress and should be proud of yourself for committing to the process. Pull out all the items from your drawer(s) and sort like items together. This will likely vary based on your personal inventory, but some of the categories you might be working with would be
Lids
Cloths
Tupperware
Silverware
Utensils
Pots
Pans
Gadgets
After your items are sorted into like-items, you’ll need to edit intentionally. This is the part where you evaluate what items spark joy in your life. If they don’t, it’s time to recycle or donate. From here, ask yourself how you can structure items and what products will support your new identified zones. Some of my favorite organization products for organizing your drawers (both shallow and deep) are Stackable Bamboo Drawer Organizers, 3 in 1 Wrap Organizer, and Deep Modular Bins. If you are looking for all of my countertop and drawer organization tops and must-haves, take a peek at my Kitchen Organization 101 blog.
Day 16
For day 16, we shifted our focus to under-the-sink TLC. This area can be cluttered and chaotic, but nothing a little time and structure can’t fix. Just like every other space, take everything out from under your sink. Wipe down the entire surface. From here, it’s time to categorize similar items together. Like I previously mentioned, I love to zone this area specific to cleaning supplies. It will likely contain a variety of items, like sponges, dish towels, cleansers, dishwasher detergent or pods, trash bags, and gloves. You probably already guessed this step, but you will want to discard any empty bottles or expired cleansers. Before you replace your products under the sink, take a little time to identify which organization items will make this space more accessible and contained. If you are deciphering which products to use, make sure to take a peek at my favorite under-the-sink essentials. If you are a visual learner, take a peek at my recent reel. I show all the steps and products I use to create a system for under the sink!
Day 17
On day 17, we shifted our focus to fridge and freezer organization. Start by removing everything from your fridge and freezer. Wipe down all the areas, so you are working with a clean and fresh space. Fortunately, when it comes to fridge products, we can typically edit items out based on expiration dates and smell (I think we all know the smell of old arugula). Once you are certain all expired and unusable items are purged, I recommend zoning your fridge (as you did the kitchen). Again, this should be unique to you, but I will provide some of my top tips for how I structure my fridge and freezer. The upper shelf of your fridge is perfect for ready to eat food (leftovers, takeout, meal preps). I love to use the middle shelf as my “dairy shelf,” so eggs, milk, and cheese. If you have a lower shelf, I like to use it for proteins (lunch meats, raw proteins). If you have two drawers side-by-side, I like to use the drawer on the left for items that do better in lower humidity (apples, pears, avocados, cantaloupes) and the drawer on the right for anything that does better in higher humidity (lettuce, broccoli, cucumber, peppers, squash). Finally, the side door is perfect for condiments and non-perishable drinks. When it comes to organization items, here are a few of my freezer and fridge must-haves:

Acrylic Bin - $12
Wine Storage Rack - $14
Eco-Friendly Container - $25
Glass Carafe - $30
Organizer Bins - $24

Acrylic Tray - $20
Freezer Bin - $25
Best By Labels - $9
For some of my must-have eco friendly storage solutions, take a peek at my recent reel. Finally, for my other top tips on organizing your fridge and freezer, read my Refrigerator and Freezer 101 blog.
Day 18 & 19
For the final two days of the week, we shifted our focus to our pantries. Step 1 is already complete, as you properly identified the type of pantry you have. Following this, you will want to remove everything from your pantry and sort like-items. From here, just as you did for your kitchen and fridge, identify zones for your pantry that support you. This is going to be dependent on your diet and lifestyle, but some of the zones you might use would be:
Breakfast items
Snacks
Condiments
Pastas and grains
Canned goods
Sauces and soup
Once you have established zones, it’s time to discard any pantry items you no longer want or need. This will likely come in two layers. Layer 1 is purging any expired items (this might be worth double checking to make sure nothing slips through the cracks). The second layer is deciphering what you actually want. If that canned coconut milk has been in your pantry for a year already, it’s probably time to collect and donate it. Once you have completed the editing step, it’s time to create a new system for your pantry.
For starters, you will want to be mindful of your most valued real estate. If you eat crackers everyday, you will want them in reaching distance. As you’d imagine, the products you use the least can slide to the back since they don’t need to be as accessible. While you are experimenting with which zone will go where, I suggest using sticky notes to label the different areas of your pantry. This is an easy way to play with how you want to set up your pantry, without committing. Finally, it’s time to find organization items that contain and structure your pantry properly. I love bins for storing snacks, lazy susans for condiments, and pop containers for cereals and grains. For more pantry essentials, take a peek at my absolute favorites. If you are using bins and containers, your final step will be labeling. Trust me when I say that this will bring clarity and efficiency to your space.