
The 5-Step Life in Jeneral Method to Home Organization
As you dive into the process of organizing, you may quickly notice that it will look chaotic in the “during” phase. This is completely normal. Do not get discouraged by it. Even for professionals, the mess in the middle of a project will look catastrophic. The key is that there needs to be some method within the madness. Organizing or decluttering without a method means that you are more likely to get overwhelmed, and then to feel either like you have to hold on to everything in your home (you don’t!) or that you should give up entirely (you shouldn’t!)
To ensure that there’s a rhyme and a reason to the mess as you tackle your own home, and to avoid feeling discouraged, I encourage you to utilize my five-step organizing method. This is the strategic set of rules that my team and I use in every single home we step into. The Life in Jeneral method is designed to work in any and every kind of space in your home, and I promise you, taking it step by step will seriously make the undertaking so much more manageable.

STEP ONE Remove All Contents from the Space
Take each and every item out of the space you are organizing. All shelves, cabinets and drawers should be bare so you are starting with a clean slate. Believe me, it can be tempting to cut corners on this step. And I get that. It feels like a lot of work to take out every little object, but it’s vital to the success of the process. Being able to assess your full inventory in any given space is the key to being able to make fully informed decisions about what stays or goes. Think about it this way: you can’t know what isn’t serving you if you can’t see everything.
Once everything is out of the space, wipe down all shelves, drawers, and surfaces. A fresh, clean surface is the foundation for the finished product.

STEP TWO Categorize & Sort
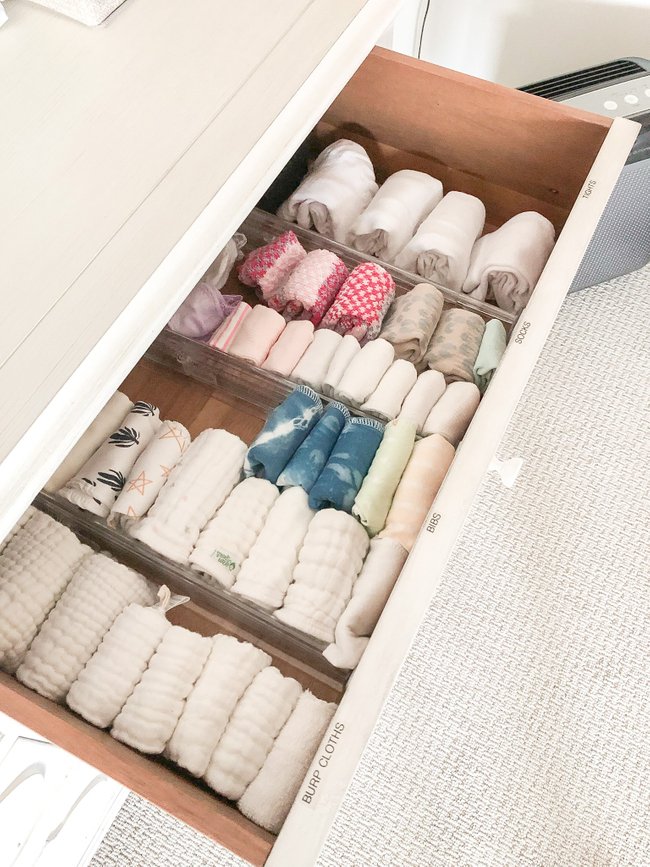
You’ve probably seen the words “zone” and “category” a hundred times when you’ve looked up home organization, so let me simplify it for you: a zone is made up of related categories and categories are made up of similar, individual items. For each space you organize, you’ll identify the zones and categories specific to your inventory in a space, and sort accordingly. This means you group all like-items together so you can see how many of each item you have and where you may need to fill in some gaps. This step is where you really begin to understand the full scope of what you own or what you have accumulated in a space.

STEP THREE Discard & Donate
When you’ve removed all the items from a space and sorted them into categories, it’s time to decide what to discard or donate. This step, which I like to call purging, is where those mental and emotional barriers to organizing are almost often triggered. But asking yourself the right questions (and answering honestly) can really help.
Ask yourself these questions when working through clutter in any room of the home:
Do I love it, use it, or need it?
Do I have duplicates?
Is it broken beyond repair?
Does it belong to me? (If borrowed, it’s probably time to give it back!)
Would I want it if I didn't already have it?
Is it expired?
Would I buy it again?
Am I saving it for someone else?
Do I have the space for this where I live today?
If it hadn't been brought to my attention, would I even have missed it?
Is it serving the lifestyle I want to create?
Is it critical to save? If so, why?
Please keep in mind that it’s okay if this step takes some time—that’s totally normal. Emotional barriers often resurface during the purge, making you question why you’d get rid of anything to begin with. If you’re getting overwhelmed while going through the questions, I recommend taking a break. This way, you can ensure you’re operating with fresh eyes and a clear mind.
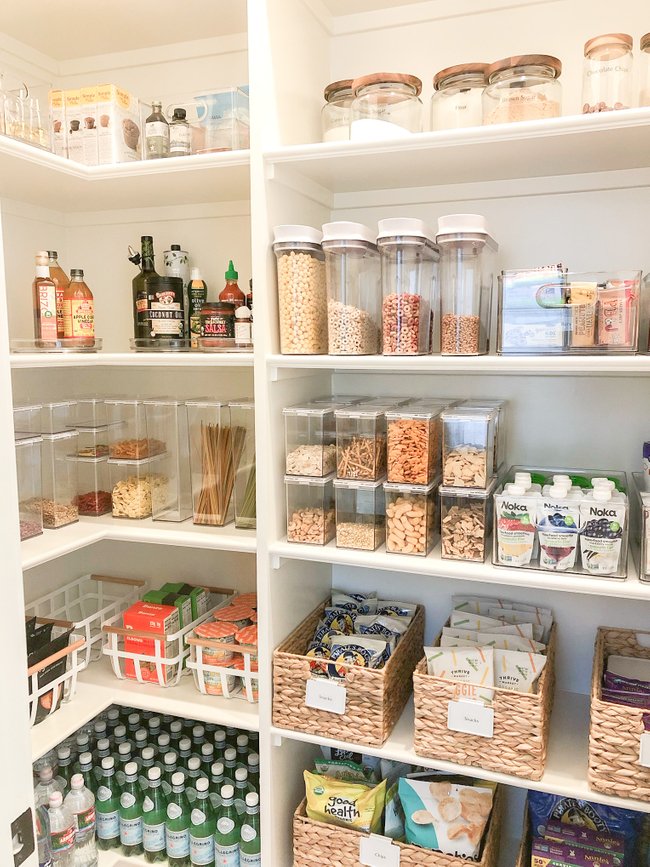
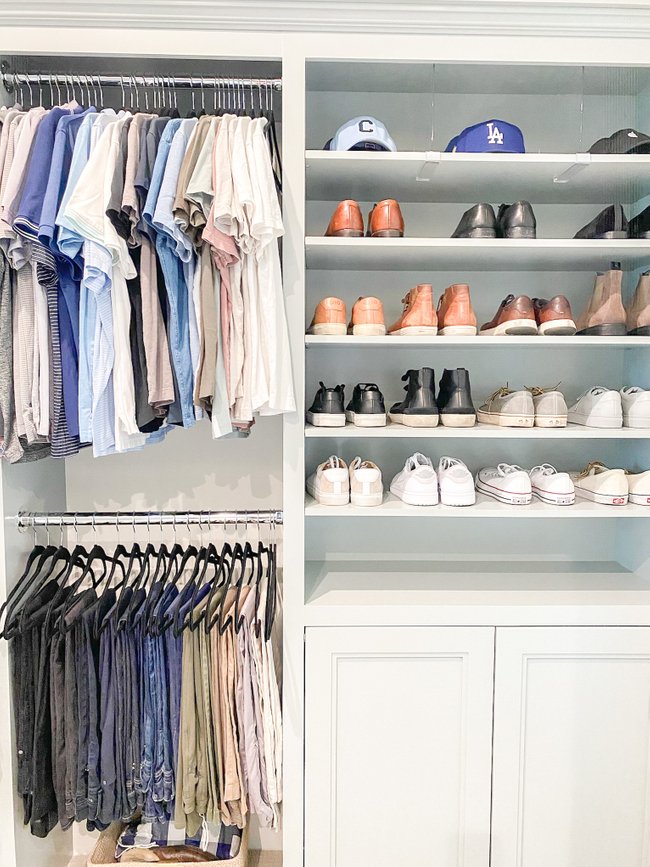
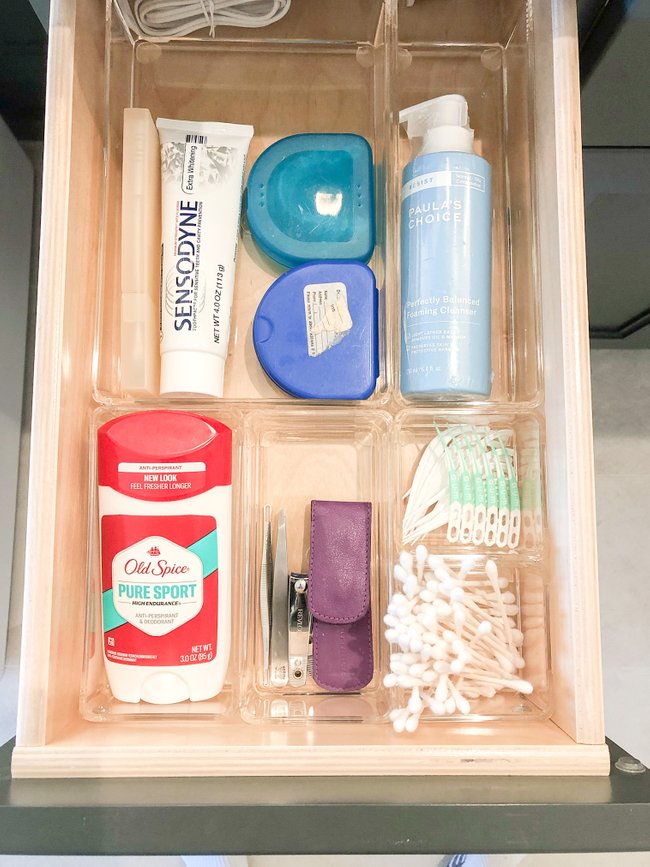
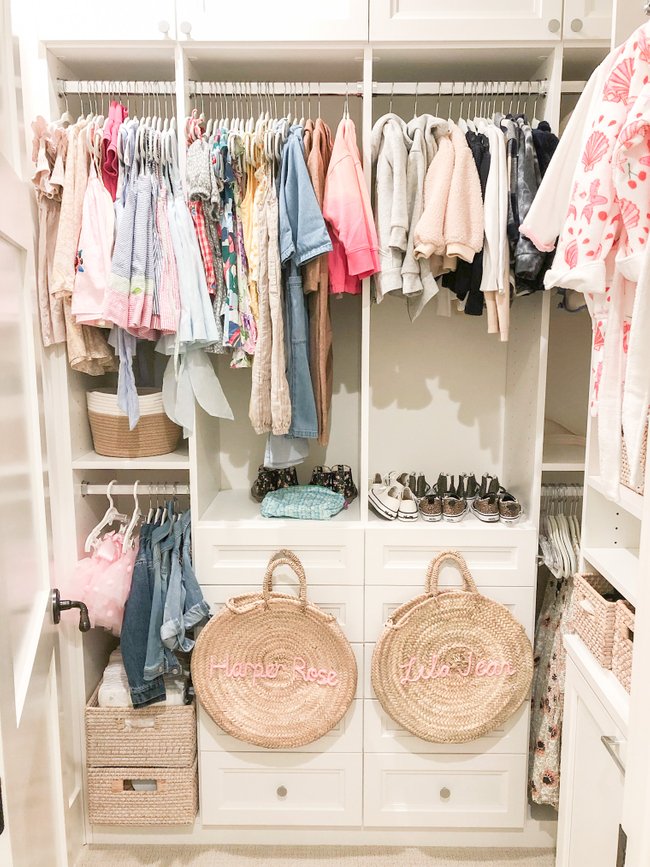
STEP FOUR Add Organizational Systems
When you’ve worked through what you’re going to keep and you’ve removed what will be discarded or donated, you’ll know how much stuff you actually need to store. You can begin determining where to place each zone in the space and what kind of organizational system will work best for both the space and the items stored there.
An organizational system is a system created to separate and hold categories of items. Adding containers ensures that every item in a space has a specific home that can be maintained as you move through life. My recommendation is to overbuy a little bit on product types so that you can “puzzle-piece” various containers into the actual drawer, shelf, or cabinet to see what fits best with both your aesthetic and size of the space.

STEP FIVE Maintain
Once each item and category have a home, you will always know where to return them when done with use. When organizational systems are in place, it’s really hard not to maintain them, but it does require commitment. Small daily habits make all the difference.
For tips, tricks, product picks, and inspiration for home organization, make sure you grab your copy of Life in Jeneral if you haven’t yet and sign up for the LIJ Book Club! There’s a 70 page workbook with exercises to help you work through your emotional barriers and goals in relation to organizing, and of course, step-by-step guidance to do the work. For even more support and encouragement, follow along with the book club on our Instagram, too!